How to replace a motorcycle stator?
Motorcycle charging problems can reside in a faulty stator not generating (enough or any) electricity. The stator is the fixed part of the alternator around which the magnetic flywheel rotates generating AC power that is then passed down to the regulator/rectifier, which converts it to DC power ensuring the voltage is within certain limits not to damage the battery. Faulty stators can be a more common issue on larger engine/more powerful motorcycles that generate large amounts of AC power basically frying the stator.
Steps to remove a motorbike stator
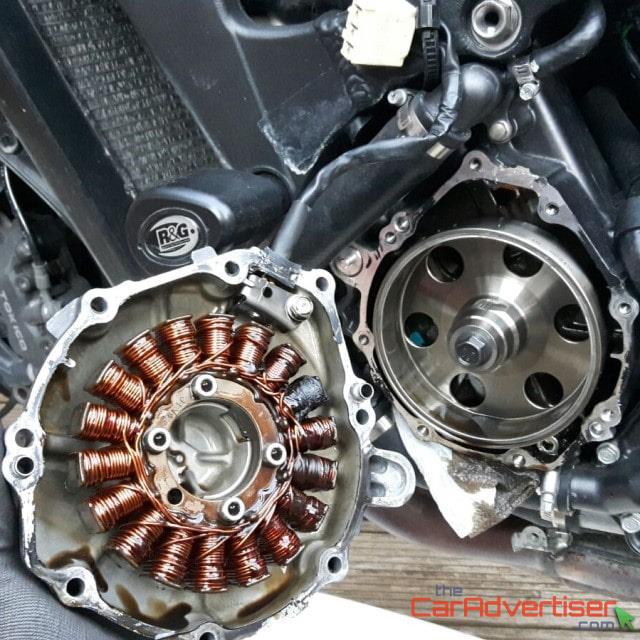
Replacing the stator is not too complicated and requires a socket set and some heat resistant gasket repair silicone only. As a guide you can expect to pay about £80 for a new stator on larger engine motorcycles and about £5 for the gasket repair seal. The photo shows a 2007 Honda CBR1000RR Fireblade, which model (06-07) is highly affected by this problem therefore Honda extended its manufacturer warranty from 2 to 7 years for VIN numbers within a certain range, but other manufacturer's models can also suffer the same issue. If out of warranty (as this example) the manufacturer will probably (Honda UK certainly) refuse to help even just by supplying the defective part for the problem they are very well aware of. It's still worth a try, but if you rely on your motorcycle running as soon as possible, you are better off fixing it as chances are you'll end up doing it regardless. On 2006-07 Honda Fireblades the stator is located on the left hand side behind the crash protector.
- Ensure the engine is cool
- Remove the plastic fairings (if applicable)
- Locate the gasket cover
- Unplug the electrical connection
- Test all 3 connection points with a multimeter to ensure it is the faulty part
- Place a tray below to catch some engine oil
- Remove the bolts from the gasket cover with a socket wrench
- Take off the gasket cover*
- Remove the bolts holding the stator
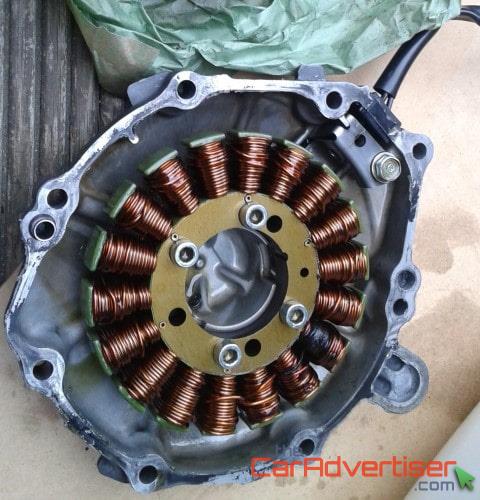
- Remove the stator from the cover
- Clean the cover and body of any oil and sealant residue
- Replace the stator
- Apply gasket sealant around the electrical wire output
- Fix the wire in place with the bolt
- Ensure all the internal pins are in place
- Apply gasket sealant around the clean and dry body/cover perimeter
- Fix the cover in place gently
- Secure it with bolts (do not overtighten as they can snap)
- Reconnect the electrical wire
- Allow to dry completely
- Remove dried, excess sealant (if too much)
- Replace lost engine oil (if needed)
- Start engine and check for oil leak
- Test electrical power output (if required)
*Step #8 is the hardest and most sensitive part as nothing to grab onto and the gasket seal and magnetic flywheel holds the cover in place. Try tapping the cover around gently to break the seal, but note that the gasket cover cannot slide off sideways as there are pins inside holding in its designated location. Sometimes its helpful to wedge a thin piece of plastic/wood (do not use metal as it can easily damage the body or cover) into the gap when it starts coming off as the gap tends to close immediately when the cover is pulled from the opposite side as the strong magnetic flywheel pulls the cover back into place.
Did you find this article helpful?
Help the site grow with more content to reach a wider audience while keeping it free!